
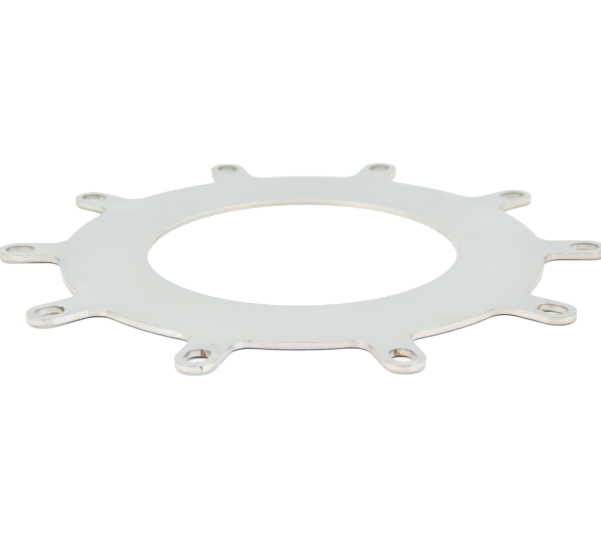
Disc


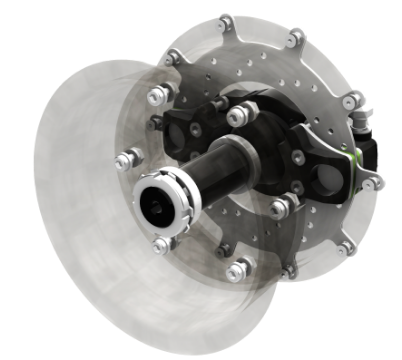
Diamond Wheel - Complete braked wheel kit
1 650 g
Full weight
600 kg
Max. payload
3 tons
Max. resistance
Order
Braked wheels for microlights with carbon rims
Diamond Wheel - Complete braked wheel kit
From €2,640 incl. VAT
The EVOSKIL ULM rim is a fusion of advanced composite material technologies, aeronautical manufacturing processes and innovative design. It offers exceptional performance, strength and durability for a safer, more efficient flying experience. Benefit from cutting-edge technology combining safety, performance and durability for an incomparable flying experience.
The kit includes 2 braked wheels equipped with :
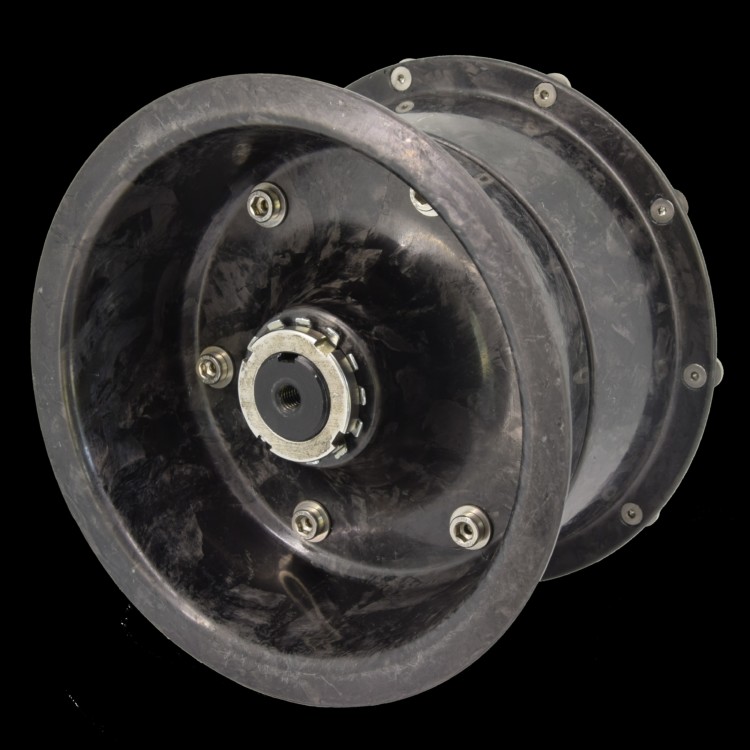
2 4.00x6'' carbon rims
2 rockets
2 braking systems
2 conduits rigides de liaison entre les 2 étriers avec vis banjo titane
Description
Features
Assembly instructions
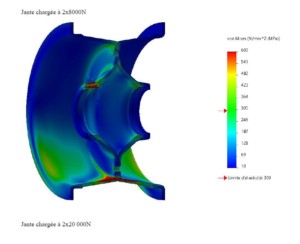
Resistance tests
Downloads
The new-generation ULM rim is made fromHexMC, a high-strength , high-carbon prepreg produced by HEXCEL, also used on the Airbus A380. Thanks to the random arrangement of its fibers, this rim offers more homogeneous mechanical resistance than bi-directional or uni-directional fabrics. It is made in France using a complex and precise manufacturing process, which guarantees unrivalled quality, strength and durability.
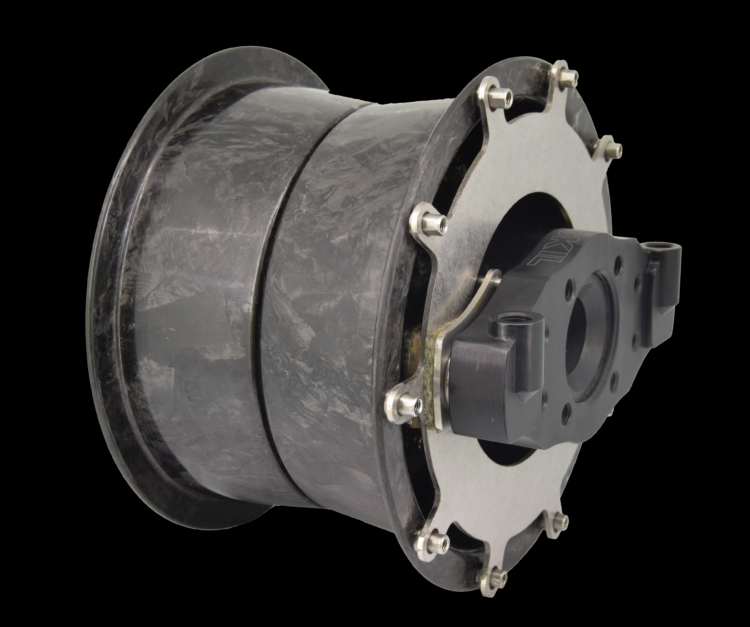
To complement the carbon rim, a hub and braking system have been designed and optimized for our small aircraft. The stationary parts are made of 7075 T6 aeronautical aluminum with an anodized finish for optimum protection against oxidation.
Each product undergoes a battery of rigorous tests to guarantee compliance with the advertised specifications, ranging from dimensional and visual checks to destructive and endurance tests. What's more, thanks to our adaptability, we are able to customize the assembly to ensure compatibility with any ULM.
| Features | Detail |
| Materials | HexMC Carbon, Aluminium 7075 T6, Stainless steel 304L |
| Weight | 1650g x 2 for complete braked wheel set |
| Permissible static load | 600Kg per wheel |
| Maximum resistance | 3 tonnes +/-100Kg |
| Aluminum finish | Black anodized |
| Dimensions | 4.00×6’’, montage 4 M8 entre axes 40*40mm |
| Adaptability | Between-axis mounting can be modified, centering possible |
| Manufacturing | Made in France |
| Durability | Corrosion-resistant, even in contact with salt water |
| Tests | Dimensional inspection, Inflation testing, Destructive testing, Endurance testing |
| Additional services | After-sales service and warranty, Customized service |
installation instructions
HOW DO I MOUNT MY 4.00×6'' EVOSKILL® CARBON RIM?
Decoloring
On receipt of a rim kit, visually check the integrity of the packaging.
Do not use blades longer than 5mm for unpacking.
Dévissez l’écrou KM5 et la rondelle de sécurité afin de retirer la roue de la fusée. Un simple effort axial est nécessaire pour sortir la roue de la fusée.
Tire mounting
Remove the rim from the shaft by unscrewing the KM5 nut and MB5 lock washer, then pull the rim axially off the shaft. The brake disc must remain in place in the brake calipers.
Séparez la jante en retirant les 6 vis M6 qui lient les deux demis jantes. Pour le transport seules deux de ces vis sont serrées modérément avec des écrous non freinés, ceux-ci ne seront plus utilisé.
Before installing the tire, apply tire grease to the tire and the part of the rim that will be in contact with the tire.
Pour un montage avec chambre à air :
Insert the inner tube into the tire.
Position the tire with inner tube on the outer rim half, the one with the valve hole.
Passez la valve à travers l’orifice de la demi jante.
Pour un montage tubless :
Assurez vous que le joint torique assurant l’étanchéité entre les deux demi-jante est bien dans son logement sur la demi-jante coté disque de frein. Ce joint est collé en usine pour faciliter le montage.
Afin de faciliter l’étanchéité enduisez ce joint et son logement sur l’autre demi-jante de liquide préventif (petite fiole blanche).
Placez le pneu sur la demi-jante coté valve.
Aidez vous de l’outil de fermeture de jante Evoskil ou de l’arbre de la fusée pour faciliter l’alignement axial de l’ensemble.
- Placer la demi-jante coté disque sur l’arbre.
- Placez l’entretoise. Attention cette entretoise est conique, faite coïncider les diamètres de roulement et d’entretoise.
- Placez l’autre demi-jante préalablement préparée avec le pneu.
- Montez les 6 vis CHC M6*20 + 2 rondelles + écrou nylstop pour fermer la jante.
- Serrez ensuite les 6 boulons en quinconce à 9Nm.
- Inflate the tire, 3.5 bar max.
The tire should rest easily on the rim sidewall, and we recommend removing the valve obus for the first inflation.
- Versez le reste du liquide préventif par la valve avant de remettre l’obus de valve.
- Gonfler le pneu à la pression désirée et vérifier l’absence de fuite.
Nota : Les vis fournies sont lubrifiées afin d’éviter le grippage vis/écrou connu sur l’inox.

If your tire is too wide to easily close the rim with the CHC M6*20 screws supplied, use 2 M6 screws of sufficient length diametrically opposed to pre-close the rim before fitting the 4 screws supplied in the holes available. You can then remove the 2 temporary screws and fit the last 2 M6*20 CHC screws supplied.
Mounting the spindle on the landing gear
Exemple de montage applique standard 4 vis M8 entre axe 40*40mm.
Assurez vous au préalable de la correspondance de l’entre axe de fixation fusée/train. Cet entre axe est de 40mm au carré sur l’embase standard Evoskil
Positionnez la fusée sur le train, orifice de durite de frein vers le haut de préférence. Un montage vertical est possible. En revanche un montage orifice vers le bas rendra la purge du circuit difficile.
Assemblez la fusée au train avec 4 vis M8 classe 8.8 minimum de longueur adaptée à l’épaisseur de votre train. Ces vis doivent dépasser de 13mm de la jambe de train afin de traverser l’intégralité de l’embase de la fusée. Ces vis ne doivent pas dépasser de plus de 15mm de la jambe de train.
The use of washers adapted to the material of your strut, coupled with a medium threadlocker, will guarantee the stability of this assembly.
Remember to degrease any glued parts.
Tighten the 4 screws to a torque of 18Nm.
Fitting brake hoses
Your brake line coming from the master cylinder must end in a Ø10.2mm banjo.
Mount this conduit on the double banjo bolt side, stacking joint/airplane conduit/joint/connecting conduit/joint.
Hold the conduits so as not to twist them when tightening the banjos.
Tighten banjo bolts to 25Nm.
Draining the circuit
Use DOT4 brake fluid.
Depending on your installation (hose routing, tee, limiter, etc.) and your master cylinder, bleeding can be done by pushing the fluid through the master cylinder or through the calipers.
We recommend bleeding by pushing brake fluid through the bleed nipples on the calipers.
Avant la purge, mettez 3 à 4 tours de ruban téflon sur la vis de purge afin d’éviter les fuites de liquide de frein par le filetage de cette vis.

Restez vigilant à ne pas répandre de liquide de frein sur l’ensemble des pièces, notamment sur les plaquettes de frein. Un nettoyage au solvant après la purge est indispensable.
Nous recommandons l’utilisation d’un maître cylindre Ø12.7 à 17mm pour deux roues et d’un maître cylindre Ø11 pour une seule roue. Plus le diamètre de piston émetteur est petit, plus le freinage est puissant. La limite basse du diamètre de piston émetteur est la course de levier qui doit permettre de freiner fortement avant la butée (avec une purge parfaite).
The calipers are tested up to 140bars, but a maximum pressure of 80bars is recommended. This pressure is more than sufficient for light vehicles. In practice, a pressure of 10 to 20 bars is required for normal braking, while a pressure of around 40 bars is generally sufficient to lock the wheels on dry grass, compared with around 60 bars on hard ground (variable according to tires and machine weight).
Mounting the impeller on the shaft
Place the wheel (with the stainless steel studs facing the axle) on the axle and press gently until the brake disc is ready to receive the studs. Align the brake disc so that the pins on the rim all face the slots on the disc.
Push in the rim until the bearing stops.
The brake disc must be axially free on the pins. It is the brake pads which (once the system has been bled) hold the disc axially.
Fit the MB5 washer and KM5 nut.
Attention : la face conique de l’écrou doit être contre la rondelle de sécurité MB5.

Utilisez la douille adaptée à l’écrou KM5 :

Serrez l’écrou KM5 à 25Nm puis serrez jusqu’à l’alignement d’une encoche de l’écrou avec une dent de la rondelle de sécurité. Rabattez la dent de la rondelle dans l’encoche de l’écrou.
Voilà, votre montage est terminé. Rappelez-vous, il est important de suivre ces étapes attentivement pour assurer la performance et la sécurité de votre kit de jante. Assurez-vous toujours que toutes les pièces sont bien serrées et en place avant d’utiliser votre appareil. Le respect de cette notice ainsi que du manuel d’utilisation est indispensable à l’engagement de toute garantie.
We strongly advise you to replace the bolts and nuts with new ones every time you install a new product, especially the safety systems (MB5 washer and nylstop nut).
 |
 |
Rim
Rocket

4.00x6'' CARBON rim
The microlight rim of the future
"Lighter than aluminum, stronger than steel.
Our Evoskil® carbon wheels are made from HexMC, a material developed by global composites manufacturer Hexcel. This high-strength, high-carbon prepreg is also used in highly demanding aerospace applications, such as the Airbus A380. The random arrangement of HexMC fibers provides exceptional homogeneous mechanical strength.
Lightweight
Resistance
Durability
560 g
Weight of rim alone
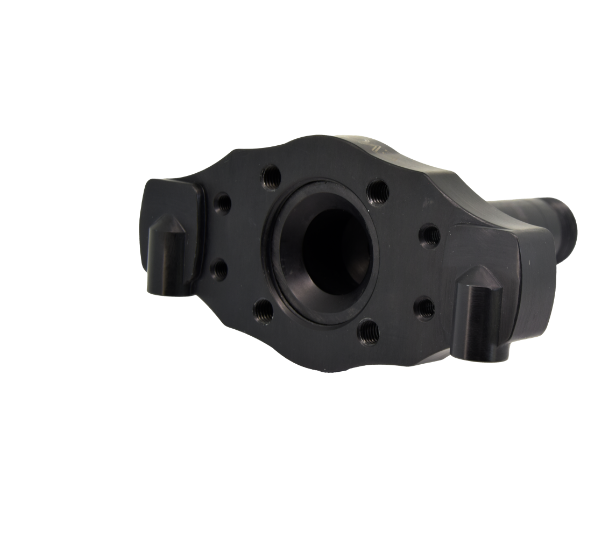
Wheel spindles
- Made from anodized 7075 T6 aluminum
- Elegant black finish and assured durability
- Stainless steel screws and pistons
- Attached directly to aircraft landing gear
Each rocket is laser-engraved. This engraving makes it easy for you to find your product on our website and access all relevant information, such as assembly instructions or available spare parts.
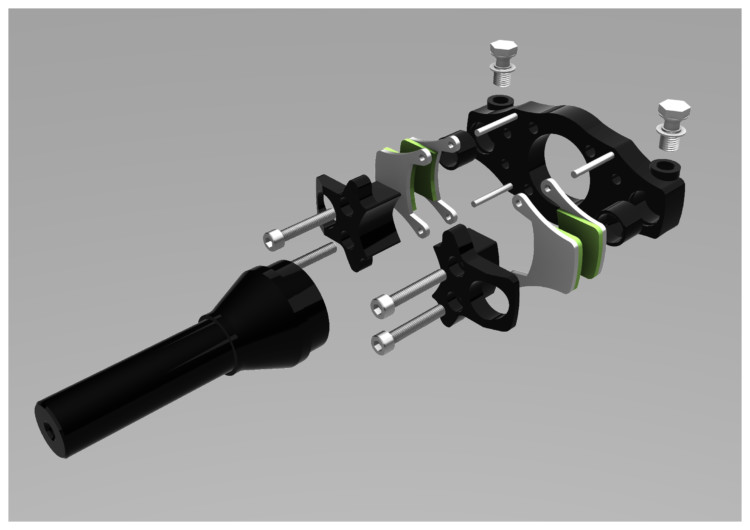
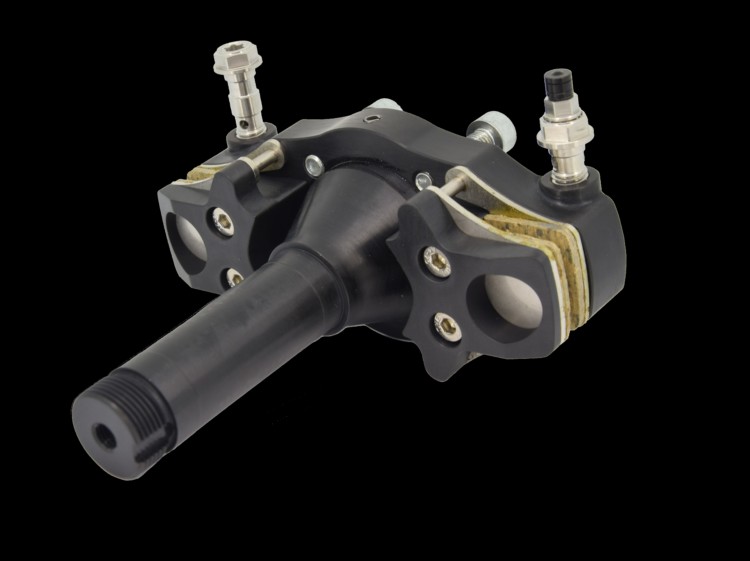
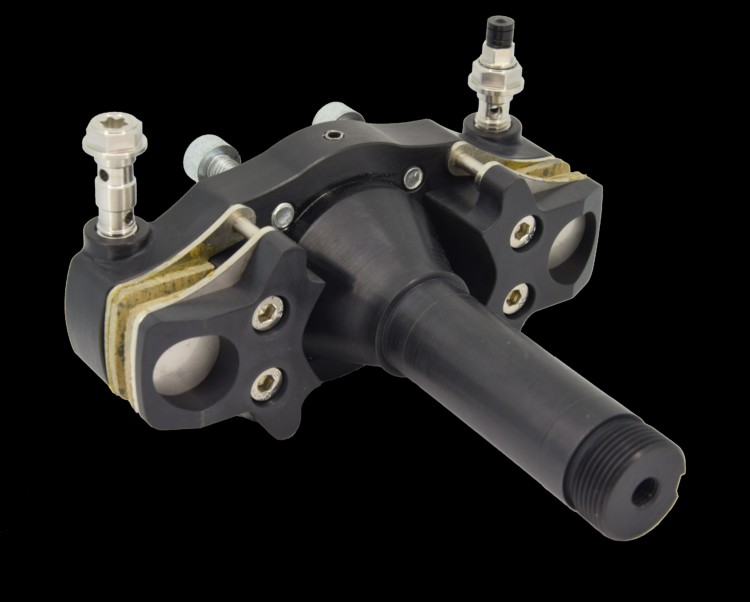
Braking system
Robust & durable
All the immobile parts making up the brakes in our kit are made of anodized 7075 T6 aluminum, renowned for its strength and lightness. Bolts, pistons, brake pad support pins and brake discs are made of stainless steel, for their resistance to corrosion and heat.
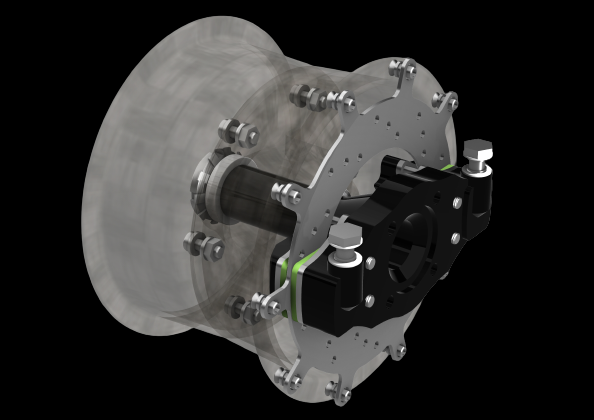
For maximum safety, the wheel is secured with an MB5 lock washer and a KM5 nut. The brake caliper is not just an add-on part - it's integrated directly into the stub axle, further enhancing the efficiency and robustness of our braking system.
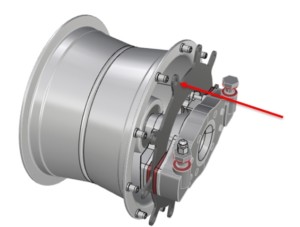
The brake disc is float-mounted, ensuring perfect alignment at all times and virtually zero thermal conductivity towards the carbon rim.
Test conditions
500 kg
Device weight
70 km/h
Landing speed
20 m
Distance to stop
2000
Number of brake applications
Lightweight
Easy to dose
Outstanding endurance
Modular
Our design process
01
Compression molding
Carbone Hex MC is subjected to a temperature in excess of 100°C and a pressure of 30 tons in a specially designed press, shaping the material with custom molds.
02
Extraction and separation
Once the molding process is complete, the rim is carefully extracted and separated from the mold, using organic and natural products.
03
Visual and dimensional inspection
The rim undergoes a rigorous assessment, where we visually check its finish and precisely measure its dimensions to guarantee conformity.
04
Deburring
Any burrs of resin that may remain after molding are gently removed, ensuring a perfect finish for each piece.
05
CNC machining
The rim is machined using a digital milling machine to drill the holes needed to insert the assembly screws and tire inflation valve.
06
Mounting bearings and pins
We use special tools to fix the stainless steel pins to the rim, ensuring optimum positioning and facilitating subsequent fitting of the brake disc.

MADE-TO-MEASURE
Unlimited adaptability
The EVOSKIL mounting base is meticulously designed to meet the specific requirements of microlights. However, we recognize the extraordinary diversity of aircraft on the market, which drives us to offer a tailor-made service. Our ambition is to create, develop and test any modification to our baseplates or other adapters to ensure trouble-free installation of our kits on an impressive variety of aircraft.
Read moreMAINTENANCE
Easy assembly and disassembly
Thanks to a carefully designed configuration, Evoskil® makes it easy to assemble and disassemble the system, and to replace worn or consumable parts. We offer all the interchangeable parts in the Diamond Wheel kit to ensure optimum compatibility and impeccable quality. For our more regular partners, we offer assembly tools that make fitting even easier.
You may also find these products useful


The reference
for ulmexperts
Covering all the needs of our small aircraft, EVOSKIL carbon rims are the key element of an overall kit. The kit is meticulously designed, incorporating wheel, hub and a braking system specially engineered for perfect harmony.
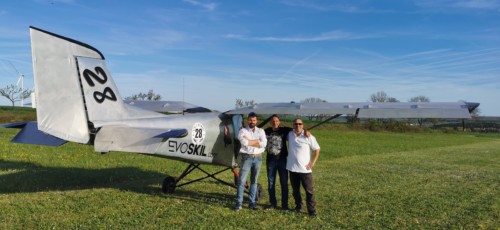
Evoskil® est partenaire d’Eric Grare Berthault, pilote ULM, Champion en compétition STOL
Eric GRARE BERTHAULT
Champion de France en compétition STOL
Read
"The Evoskil rims met our expectations, so much so that we decided to offer them for most of our appliances."
Sébastien Bertolini
Microlight manufacturer, Aéroservices Guépard
Read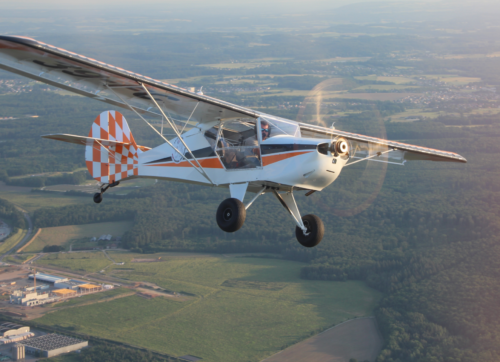
"Thanks to Evoskil® I've saved 4 kg, 5.7 liters of fuel and half an hour's flying time".
Nicolas Walster
Microlight pilot and instructor
ReadContact
You wish to order our products, become
dealer, ask a question?
Our ultralight aviation experts are on hand to answer any questions you may have, and to help you place an order, become a dealer, discuss a specific project or simply find out more about our products.